Overview
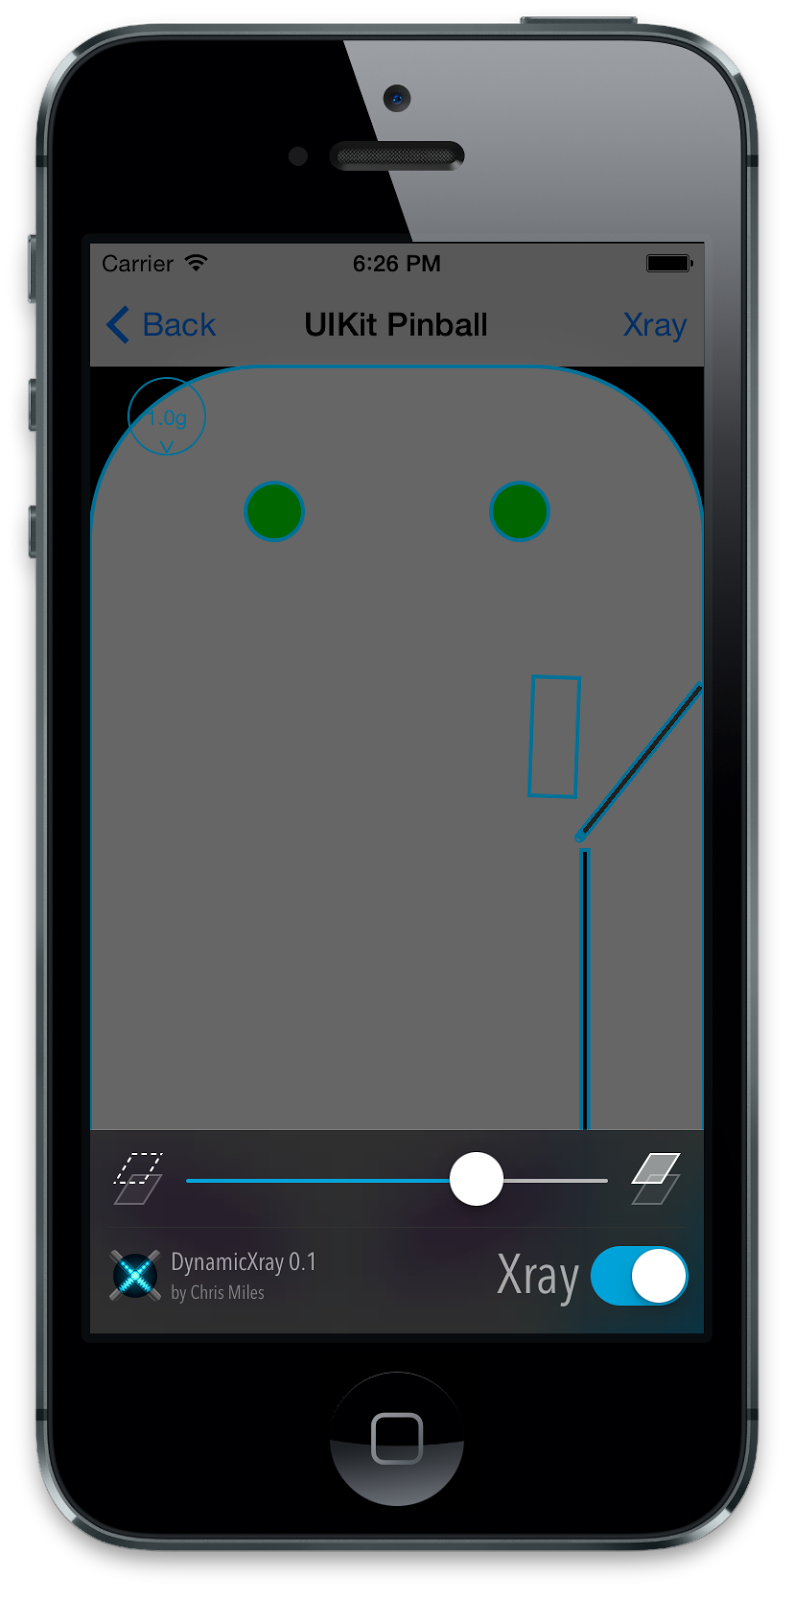
If you have done any work with UIKit Dynamics you may have found that it can be difficult to debug and fine tune the behaviour. UIKit Dynamics is driven by a rigid body physics engine (Box2D in fact) which gives the developer a lot of power, but the abstract nature of the framework can make it difficult to see under the hood of the physics simulation.DynamicXray provides a live overlay of all dynamic behaviours and dynamic items at runtime, allowing you to visualise and introspect the underlying physics simulation as it is running. DynamicXray works on both devices and simulators.

Integration
DynamicXray is implemented as a UIDynamicBehavior. This means it can be simply added to any UIDynamicAnimator to enable the introspection overlay. By default, all behaviours added to the animator will be visualised.For example:
#import <DynamicXray/DynamicXray.h>
...
DynamicXray *xray = [[DynamicXray alloc] init];
[self.dynamicAnimator addBehavior:xray];
For more control, the DynamicXray behaviour exposes options such as temporarily disabling the overlay, adjusting the cross fade between app and overlay, whether to draw dynamic item outlines, and more.
Features
DynamicXray features include:- Easy and controllable integration. Simply add the DynamicXray behavior to your dynamic animator.
- All UIKit Dynamic behaviours are visualised, including collision boundaries.
- Visually differentiate between springy and rigid attachment behaviours.
- Push behaviours are visualised by arrows representing the location, magnitude and direction of the push force.
- Snap behaviours are visualised by arrows showing where the item is snapping to.
- Gravity behaviours are visualised by an overlay showing magnitude and direction.
- All dynamic item bodies in the scene are visualised.
- Any contacts between dynamic items and other items or collision boundaries are highlighted.
- Configurable overlay cross fade control for fading anywhere between 100% application to 100% DynamicXray overlay.
- Built-in configuration panel for user to control run-time options.
Configuration Panel
As mentioned above, DynamicXray includes a built-in configuration panel to allow users to control some of the options at runtime. The configuration panel can be presented by calling-[DynamicXray presentConfigurationViewController].For example:
DynamicXray *xray = [[DynamicXray alloc] init];
[self.dynamicAnimator addBehavior:xray];
[xray presentConfigurationViewController];

DynamicXray Catalog
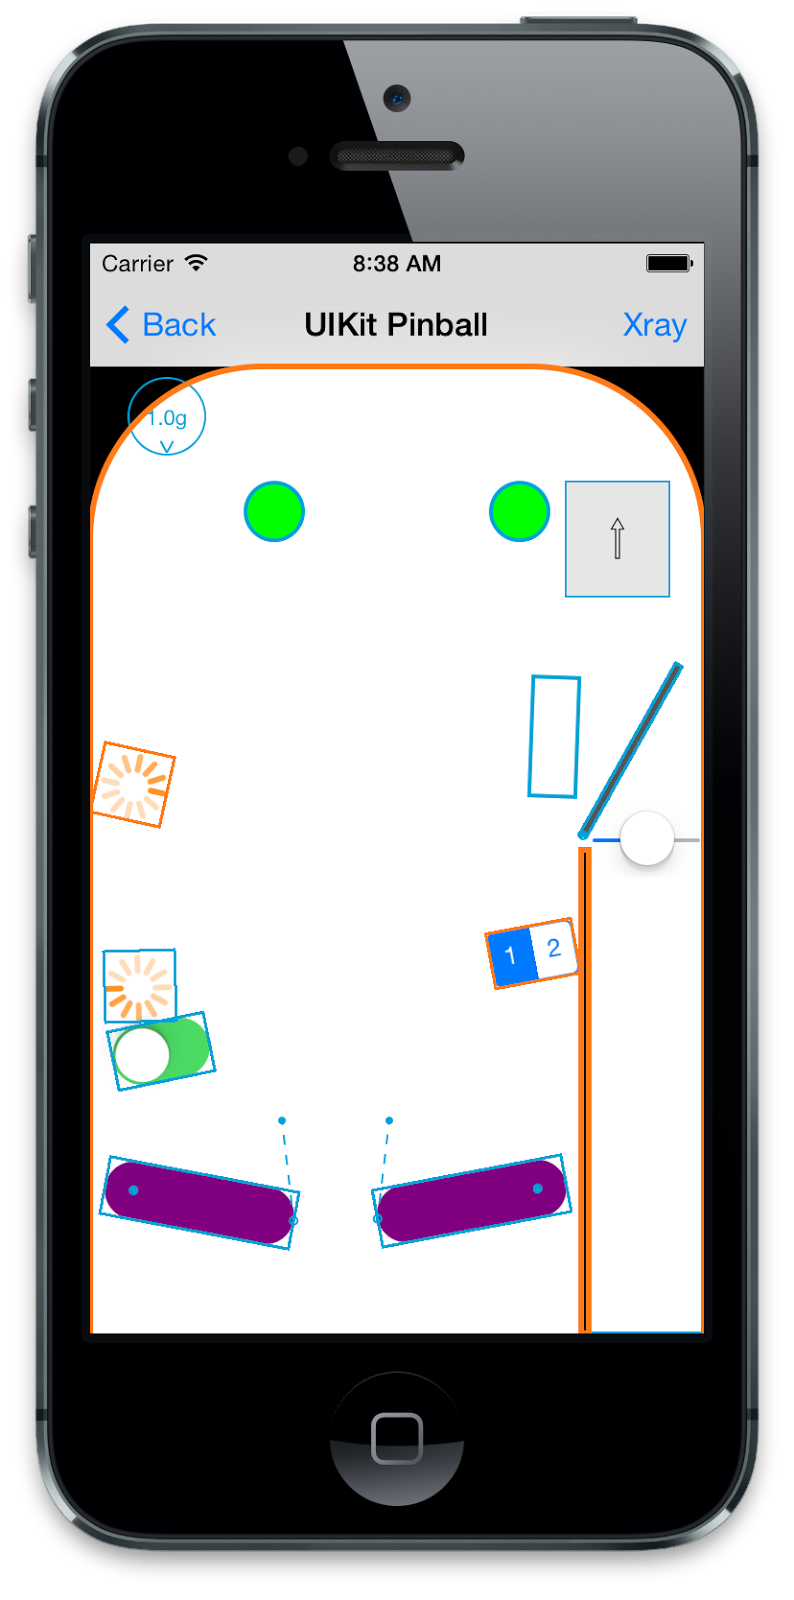
The DynamicXray source repository includes a universal iOS app containing various UIKit Dynamics demonstrations. The demos in DynamicXray Catalog were created by various authors and are all open source. The demos include DynamicXray pre-loaded so introspection can be enabled on any demo to see the inner workings.If you are interested in seeing more uses of UIKit Dynamics then take a look at DynamicXray Catalog. UIKit Pinball in particular is an interesting example of why not to use UIKit Dynamics for games.
I plan to continue adding interesting demos as I find them. Please submit a pull request if you would like to contribute a UIKit Dynamics demo to the catalog.
Videos
See more DynamicXray demonstration videos on YouTube.Get It
DynamicXray is free and open source.Download the DynamicXray framework and learn more at http://dynamicxray.net/
Download the source code from https://github.com/chrismiles/DynamicXray
Follow @DynamicXray and @chrismiles on Twitter.